Adding a product filter for WooCommerce is a simple yet powerful way to improve the shopping experience on your online store. Customers often come to your site looking for something specific, whether it's a certain size, color, price range, or material. Without filters, they’re forced to scroll through endless product listings, which can lead to frustration and cause them to leave without making a purchase. Product filters help users narrow down their search quickly and easily, increasing the chances of a sale.
In this step-by-step guide, we’ll show you how to add attribute-based filters to your WooCommerce store. These filters allow shoppers to sort and browse products by specific features like size, color, fabric, brand, and price. This not only helps your customers find what they’re looking for but also improves your site’s navigation and overall usability. Adding filters can also reduce bounce rates, increase average time spent on your site, and ultimately lead to higher conversion rates. Whether you’re running a fashion store, an electronics shop, or any other type of e-commerce business, filters make your site more organized and user-friendly.
Pairing this with WooCommerce checkout page customization ensures that shoppers not only browse easily but also complete their purchases smoothly, creating a seamless shopping experience from start to finish.
That being said, let’s walk you through how to effortlessly set up product filters on your WooCommerce store. In this guide, we’ll cover how to filter products using both built-in attributes and custom attributes.
Step 1: Install a Product Filter Plugin

To start, you need to install a plugin that adds a product filter for WooCommerce functionality to your store. From your WordPress dashboard, navigate to Plugins Add New. In the search bar, type “YITH WooCommerce Ajax Product Filter”, a widely used and trusted plugin that offers dynamic filtering tools. Once it appears, click Install Now and then Activate. This plugin allows you to create customizable filters that improve user navigation and help shoppers find products faster.

The plugin is free and works seamlessly with WooCommerce, making it a great choice for beginners and experienced users alike. After activation, you’ll be ready to create filters based on categories, tags, attributes, and more. Whether you're managing a large inventory or want to enhance customer experience, this plugin sets the foundation for effective filtering. With the plugin installed, you’re now ready to move on and build your first product filter for WooCommerce to match your store’s layout and customer needs.
Step 2: Create a New Filter

With the plugin activated, you can now begin building your first product filter for WooCommerce. In your WordPress dashboard, go to YITH Ajax Product Filter from the left-hand menu. On the plugin's main screen, click the “Add New Filter” button. This will open a configuration panel where you can define the filter’s settings. The first field you’ll see is the Filter Name. This name is for internal use only, so choose something descriptive like “Filter by Category” or “Filter by Color” to keep things organized.

Giving your filters clear and meaningful names makes it much easier to manage them later, especially if you plan to add multiple filters for different product attributes. Whether it’s filtering by size, price, material, or something else, having a logical naming system will prevent confusion and save time. Once the filter is named, you’re ready to configure how it behaves, which product data it interacts with, and how it will appear to your users.
Step 3: Set Filter Conditions
After naming your filter, the next step is to define what it will filter. Under the “Filter for” dropdown, choose the type of data the filter should target. The plugin lets you filter by categories, tags, custom attributes, price range, rating, and more. If you're using the free version, you'll mostly work with product categories and tags. For this example, let’s say you're setting up a product filter for WooCommerce by category. Select “Taxonomy” and then choose “Product Categories” from the options that appear below.

Next, in the “Choose Terms” field, list the specific categories you want this filter to apply to. This allows you to narrow down what users can filter, such as “Men’s Clothing,” “Accessories,” or “Home Decor.” You can select multiple terms based on your inventory and structure. Defining these terms carefully ensures users can easily navigate your store and find what they're looking for. Once terms are selected, your filter is now configured to interact with real product data.
Step 4: Choose Filter Display Type

Once you've set the conditions for your filter, it’s time to decide how it will look on the front end of your website. In the “Filter Type” dropdown, you can choose from several display styles such as checkboxes, dropdown menus, color swatches, text lists, and more. Each type affects the user experience differently. For instance, dropdowns save space and are ideal for compact layouts, while checkboxes let users select multiple options at once, perfect for filters like size or brand.
You can also enhance usability by enabling optional features. Activate “Search Field” to allow users to quickly find specific filter terms within a long list. Enable “Show as Toggle” to make the filter collapsible, saving space and improving page appearance. These visual and interactive settings make your product filter for WooCommerce more engaging and user-friendly. Tailoring how your filters display ensures they match your theme design and meet the browsing preferences of your customers.
Alongside this, effective WooCommerce inventory tracking helps store owners manage stock levels in real time, avoid overselling, and provide accurate product availability to shoppers further improving trust and the overall shopping experience.
Step 5: Configure Filter Sorting
Now that your filter is set up and styled, the next step is to define how the filter options will be sorted. In the “Order by” dropdown, choose how you'd like the terms to appear, by name, term count, or slug. Sorting by name arranges options alphabetically, which is ideal for categories or tags. Term count organizes them based on the number of products under each term, helping highlight popular choices. Slug is more technical and often used for specific SEO or development needs.
After choosing your sorting method, set the order direction by selecting either ASC (ascending) or DESC (descending). For example, choosing ASC with “name” will list terms from A to Z. Sorting improves navigation and makes your product filter for WooCommerce easier to use, especially if you have many product categories or tags. Properly ordered filters guide users more intuitively and help them find relevant products faster, enhancing their overall shopping experience.
Step 6: Save and Repeat
After finalizing the filter settings and display options, scroll down and click the “Save Filter” button to apply your configurations. Your new filter is now stored and ready for use on the front end of your store. Saving ensures that all selected terms, display types, and sorting preferences are retained. This is a crucial step, as filters won’t appear or function until properly saved. Always double-check your settings before saving to avoid unnecessary edits later.
If your store sells a wide range of products, you'll likely need multiple filters. To do this, simply repeat the process by clicking “Add New Filter” again. For instance, after creating a category filter, you might want to add filters for color, size, material, price, or ratings. Each product filter for WooCommerce can target a specific attribute and use a different display style based on what suits your layout. By combining multiple filters, you can create a seamless and efficient product discovery experience for your customers.
Step 7: Add Filters to Your Store
Once your filters are saved, the final step is to display them on your WooCommerce store so customers can start using them. Go to Appearance Widgets in your WordPress dashboard. Locate the YITH Ajax Product Filter widget and drag it to your desired widget area, such as the sidebar, shop page, or header, depending on your theme layout. This widget allows you to choose which filters to show and where they'll appear on the site.
If you're using a page builder like Elementor or Gutenberg, you can also insert the filter widget directly into your shop layout. Just search for the YITH filter widget block and drag it to your preferred location on the page. Once added, the product filter for WooCommerce will be live, letting users instantly narrow down products using your custom criteria. This improves navigation and enhances user experience by helping visitors find what they need quickly and efficiently.
WordPress Themes with Product filter by Classic Templates
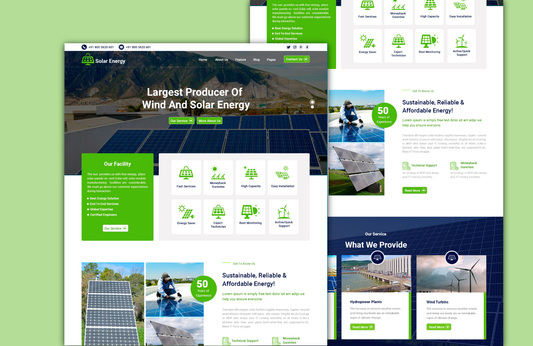
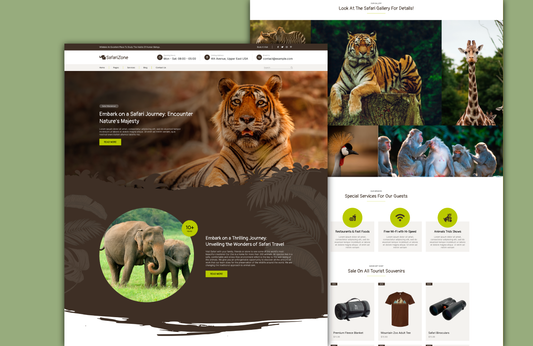
1. Classic Ecommerce Pro

The Classic Ecommerce Pro theme is tailored for modern online stores, whether you’re selling fashion, electronics, furniture, cosmetics, or groceries. With a sleek design and responsive layout, it ensures your site looks flawless on every device. The theme includes essential navigation links like Home, Blog, FAQ, Contact Us, and a dedicated “My Account” section with options for Cart, Checkout, and Store access, making customer journeys smooth and intuitive.
Its built-in compatibility with Product Filter for WooCommerce helps customers find what they need quickly, boosting conversions. Advanced customization features such as 100+ font families, custom color palettes, and custom CSS/JS support allow you to make your store truly unique.
You’ll benefit from custom page templates, a customizable homepage, inner page layouts, and support for banner sliders, galleries, and sidebars. SEO-ready and translation-compatible with RTL support, this theme meets high WordPress standards. With latest blog support, footer widgets, parallax backgrounds, and contact forms, it’s a complete solution for any WooCommerce store.
2. Affiliate Marketing WordPress Theme

The Affiliate Marketing WordPress theme is designed for entrepreneurs looking to build a high-converting online store or affiliate marketplace. With a clean layout and visually engaging design, the theme is ideal for showcasing a variety of products, from electronics and fashion to furniture and smart gadgets. It supports promotional tools like daily deals, limited-time offers, newsletter opt-ins, and featured product highlights to capture user attention and boost engagement. The built-in banner sections and intuitive navigation allow you to easily promote trending collections, sales, and new arrivals while maintaining a smooth shopping experience.
One of the theme’s standout features is its seamless integration with Product Filter for WooCommerce, allowing users to sort products by category, price, or popularity. This not only improves user experience but also drives faster conversions by helping customers find what they need with minimal effort. Whether you're running an affiliate blog, digital store, or product review site, this theme offers the flexibility and performance required to succeed in the competitive space.
3. Mobile Accessories WordPress Theme

The Mobile Accessories WordPress Theme is your go-to solution for building a modern, high-converting online store for gadgets, mobile gear, and smart accessories. Its sleek design and intuitive navigation make it ideal for showcasing everything from earbuds and phone cases to smartwatches and chargers. With a clean, responsive layout and mobile-optimized design, customers enjoy a smooth experience across all devices. Eye-catching banners, product highlights, influencer picks, and interactive CTA buttons drive user engagement and boost sales.
Designed to support fast product discovery, this theme integrates seamlessly with the Product Filter for WooCommerce plugin. This allows your customers to sort items by categories, features, or price, making shopping faster and more efficient. Built-in SEO optimization, social sharing options, and customizable layouts give you full control over your store’s appearance and visibility. Whether you're promoting trending tech or offering exclusive bundle deals, this theme is crafted to elevate your online presence and deliver a premium shopping experience.
Conclusion
Adding a product filter for WooCommerce store is one of the most effective ways to enhance usability, streamline navigation, and boost conversions. With tools like the YITH WooCommerce Ajax Product Filter plugin, you can offer dynamic, customizable filtering options based on attributes like size, color, brand, price, and category. This not only improves the shopping experience but also encourages visitors to stay longer, explore more, and complete purchases with confidence.
Each step, from installing the plugin and creating filters to configuring their display and embedding them on your site, ensures your store remains organized and user-centric.
Paired with compatible WordPress themes like Classic Ecommerce Pro, Affiliate Marketing Theme, or Mobile Accessories Theme, your store will be well-optimized for both performance and aesthetics. Whether you're managing a niche shop or a large inventory, adding product filters gives customers the control they expect and helps you stand out in a competitive e-commerce market. Start filtering today and unlock better results for your WooCommerce store.
If you’re looking for a cost-effective way to access multiple designs, a WordPress Theme Bundle is a smart choice. It gives you a wide range of themes under a single package, ensuring you always have the right layout for any project, whether it’s an online shop, business website, or blog. This flexibility saves time, reduces expenses, and ensures your site is built with high-quality, SEO-friendly themes.