Introduction
Having a website is crucial for both individuals and businesses in the modern digital era. Having a presence on the internet can help anyone reach a bigger audience, whether your goals are to sell your products, establish a blog, perhaps display your portfolio. But a lot of people find the technical side of creating a website intimidating.
Do not be alarmed if you find yourself putting off building a website since you are unsure of where to start. We'll take you through the quick and straightforward procedures of How to make a website in this step-by-step tutorial.
What Is WordPress?
Anyone can easily build and manage sites with WordPress, an open-source, free material management system. WordPress began as a platform for blogging and has since grown to assist users in creating a wide range of web pages, such as eCommerce stores, blogs, and portfolios.
In 2003, Matt Mullenweg and Mike Little launched WordPress, building on the work of their earlier project. They developed a platform that enables users to freely utilise, modify, and distribute WordPress technology and its derivatives under the terms of the General Public License of the GNU.
Currently, 43.1% of every website on the internet, and 63.1% of all websites created on a CMS, are powered by WordPress. Its widespread use provides proof of its adaptability, security, and simplicity.
How to make a website Utilise WordPress
After helping more than 400,000 individuals build WordPress websites, we made the choice to compile the most thorough How to make a website using the platform without knowing how to code. People of any age or skill level can benefit from this guide. But if you happen to require assistance, anyone can get free website setup assistance from our helpful employees.
This is a detailed guide How to make a website step-by-step. It has been broken into several distinct steps, and we will guide anyone through each one from the start to the end. Simply follow the steps given, and you'll finish up with a website that looks professional. Based on your requirements, we will also steer you towards the best course of action for taking your web page to the next level. Keep in mind that you can get a free website setup from us when you contact us for support.
How To Make a Website- Comprehensive Guide
Selecting the incorrect website platform is one of the many common mistakes made by beginners. Fortunately, you're situated here, so that error will not be made again. A privately hosted WordPress.org website is the ideal choice for the majority of users. You can create virtually any kind of webpage you can imagine with its thousands of themes and extras. Anyone may obtain and utilise WordPress for free, without any limits, to create any kind of webpage. When WordPress is completely free, where does the cost come from?
Because you're going to have to pay for your own web hosting company and a custom domain name, WordPress is free. The web address of your website is the name of its domain. This is the address that visitors to your web page will enter into their browsers. You'll then require website hosting. A web host is a requirement for any website on the World Wide Web to keep its website files. This will be the internet address for your website. The typical price of a domain name is $14.99 per year, while hosting starts at $7.99 per month. For the majority of people who have only recently begun out, this is a lot. For more knowledge on what are the estimate cost of making a website you can also visit our blog on Cost of making a website
Bluehost kindly consented to provide our users with a domain name for free and more than 60% off web hosting. Among the biggest hosting companies worldwide is Bluehost. Additionally, they are an authorized WordPress-recommended host provider. They are dedicated to giving back to the neighborhood and have been using WordPress since 2005. For this reason, they have assured us that our competent employees will set up your online presence for free when you are unable to do it by following this guide. They will cover the costs for us, saving customers the trouble.
Step1: Choose a Domain Name For Your Website

The very first thing when learning How to Make a Website is Choosing the perfect domain for your website is a crucial step in establishing your online presence. While we can't handpick the ideal domain name for your site, we can certainly guide you through the process of making a thoughtful choice. First and foremost, it's essential to identify a few keywords that best represent the content and purpose of your website. These keywords will not only help with search engine optimization but also provide clarity and focus to your domain name. Once you have a list of potential keywords, consider using a domain name generator to explore various options and check for availability.
Websites like GoDaddy can simplify this process by suggesting available domain names based on your chosen keywords. As you review the generated suggestions, keep in mind some simple criteria for selecting the ideal domain name: it should be concise, clear, memorable, easy to say and read, and preferably end in a widely recognized top-level domain (TLD) like .com. Additionally, consider the geographical relevance of your TLD if targeting specific regions. Finally, once you've settled on the perfect domain name, you can easily register it through a hosting provider or domain registrar. Whether you're launching a blog, online store, or business website, choosing the right domain name is the first step towards building a successful online presence.
Step2: Installing WordPress

Upon registering with Bluehost through the link we provide, WordPress will be installed automatically on your account. They introduced this single-click WordPress installation to facilitate website creation for people without technical backgrounds.
- To access the 'Websites' option, navigate to your Bluehost account and then log in using the menu on the left. Just select the "Add Site" icon from that point on.
- The installation of the WordPress wizard will then open as a result.
- Proceed and choose the "Install WordPress" option, then select the bottom "Continue" button.
The following step is to give your WordPress website a title
- It's completely adaptable and easily changeable at a later time. After entering a name, select "Continue" from the menu.
- Now Bluehost will build your website and install WordPress software for you. Following installation, the newly created website ought to show up under the "Websites" menu.
- To access the dashboard and log in to your site using WordPress, simply select the "Edit Site" button.
- By navigating immediately from your browser to yoursite.com/wp-admin/, you may also access the WordPress dashboard.
Step3: Select the best theme for your site When learning How to Make a Website
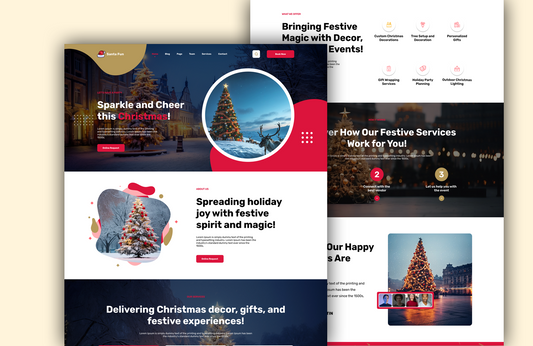
You can quickly create a stunning and useful website with the help of one of the many excellent WordPress themes available. There are a ton of options available, from prohibitively expensive complex theme packs to best basic themes. This will assist you in selecting a theme that best fits your requirements by helping you reduce the number of accessible alternatives. Below listed are the best Responsive WP Themes of The Classic Templates:
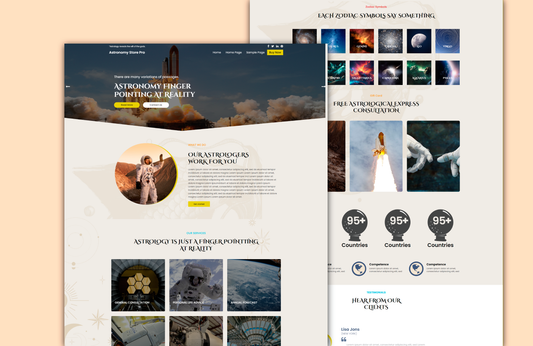
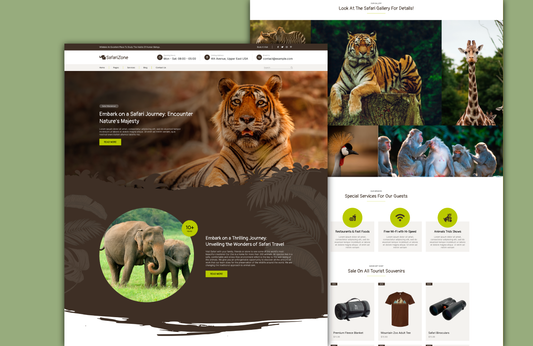
Astronomy WordPress Template

When seeing how to make a website choosing a premium WordPress theme also plays a vital role in the process. The premium WordPress template Astronomy The WordPress template provides an unequalled pathway for everything astronomical. Carefully crafted to meet the needs of science communicators, astronomers, stargazers, and space aficionados, this template captures the incredible beauty and wonder of the universe in digital space. This template's outstanding design is its basic element. The combination of the colour scheme, font, and pictures creates an immersive experience that is reminiscent of a celestial night sky. This design inspires wonder and curiosity while also teaching.
Because of its ability to adapt, it's perfect for astrophotography portfolios, blogs, space groups, and colleges and universities. Under its gorgeous exterior is an arsenal of cutting-edge features. This template enables you to offer a more engaging user experience, from scheduling platforms for celestial events to e-commerce connections to highlight astronomical products. With modification possibilities, you can shape the design to fit the identity of your company and create a visually cohesive story. The Astronomy WordPress Theme ensures that your amazing material is readable on all screens, including those of computers, tablets, and smartphones. It is responsive across all devices.
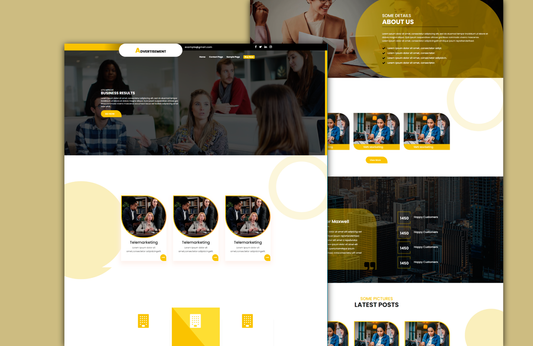
Advertisement Landing Page Premium

This design is meant for use on websites for advertising agencies, businesses, consulting firms, services for consultants, corporate and corporate business internet pages, and insurance and finance websites. Our team of experts provides support for our premium theme at all times, so it makes sense. Even a non-programmer who lacks coding knowledge can utilise the theme with simplicity because it is cleanly coded.
Publicity With WordPress subject matter, members may customise their online presences according to their brands and make other necessary adjustments. This customization feature enables users to alter the section's colour. This exquisite premium template is fully responsive and mobile-friendly, making it a complete pro theme. Our talented professionals have painstakingly spent time producing this great advertising theme just for you.
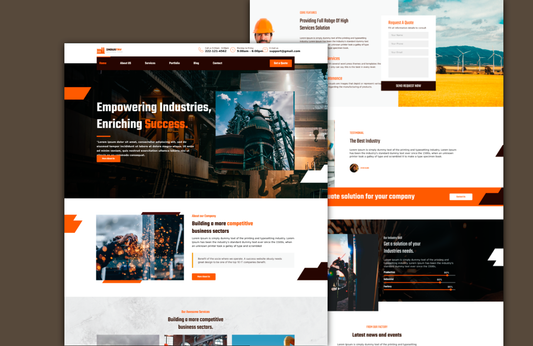
Bike Shop WordPress Theme

This premium theme offers a versatile platform that smoothly integrates into the specific requirements of the bike retail industry, elevating the online visibility for companies catering to cycling aficionados. It was meticulously created. The Bike Shop Theme, with its user-friendly design, turns online areas into visually appealing displays for a wide variety of bicycles, devices, and associated services. Because of its premium status, companies may modify more, giving them the opportunity to stand out from the competition and establish a credible online presence. The theme's visual design is contemporary and well-structured, reflecting the design sensibilities of the cycling community. this theme can be a good choice when making a website.
The goal of the design is to develop an immersive virtual showroom that invites exploration, not merely looks good. This premium theme's essential elements improve both its usefulness and appearance. The best viewing experience is guaranteed with responsive design on a range of devices. Additionally, the
Step3: Installing Essential Plugins

Installing essential plugins is a crucial step when learning How to Make a Website, as they enhance functionality, security, and user experience. Whether you're using a platform like WordPress or building from scratch, plugins offer an array of features that streamline site management and customization. The process begins with identifying the necessary plugins based on your website's objectives. These may include SEO Auditing tools to improve search engine visibility, security plugins to safeguard against cyber threats, and performance optimization plugins to enhance site speed.
Once identified, installing plugins is typically straightforward. For WordPress users, navigate to the Plugins section in the admin dashboard, click "Add New," and search for the desired plugin using keywords or specific names. After locating the plugin, click "Install Now," followed by "Activate" to integrate it into your website. However, exercising caution is vital to avoid plugin overload, which can slow down your site or introduce vulnerabilities. Stick to essential plugins that align with your website's goals and regularly review installed plugins to remove any redundant or outdated ones.
Additionally, prioritize reputable plugins from trusted developers or sources to minimize security risks. Read user reviews, check compatibility with your website platform and version, and ensure the plugin receives frequent updates and support. After installation, configure each plugin according to your preferences and website requirements. This may involve adjusting settings, integrating with other tools or services, or customizing appearance and behavior.
Some Of the Essential Plugin To Install Are
- Yoast SEO: Description: Helps optimize your website's content for search engines, improving visibility and rankings. It offers features like XML sitemap generation, meta tag customization, and content analysis for better SEO practices.
- Wordfence Security: Description: Protects your website against malware, hacks, and other security threats. It includes features such as firewall protection, malware scanning, login security, and real-time threat defense.
- WP Super Cache: Description: Improves website performance by generating static HTML files from dynamic WordPress pages. These static files are served to users, reducing server load and speeding up page load times.
- UpdraftPlus: Description: Facilitates website backups and restoration to safeguard against data loss. It enables automatic or manual backups of your website files and database to remote storage locations like Dropbox, Google Drive, or FTP.
- Akismet Anti-Spam: Description: Protects your website from spam comments and form submissions. It automatically filters out spam content, preventing it from cluttering your site and potentially harming its reputation.
- W3 Total Cache: Description: Enhances website performance and user experience by caching content and optimizing server resources. It reduces page load times, improves server response times, and supports features like CDN integration.
- Elementor: Description: A drag-and-drop page builder plugin that enables easy customization of website layouts without coding. It offers a wide range of design elements, templates, and styling options for creating visually appealing pages. This plugin is the Best WordPress plugin when seeing How to Make a Website
- WooCommerce: Description: Transforms your website into an e-commerce store, allowing you to sell products and services online. It provides features for product management, payment processing, shipping, and order tracking.
- Jetpack by WordPress.com: Description: Offers a suite of tools to enhance website functionality, security, and performance. It includes features like site stats, social sharing, site monitoring, downtime alerts, and automated social media posting.
- Smush: Description: Optimizes images on your website to improve page load times and performance. It compresses and resizes images without sacrificing quality, reducing file sizes for faster loading without manual intervention.
These plugins cover essential aspects of website management, including SEO, security, performance optimization, backups, e-commerce, and content creation, ensuring a robust and efficient website experience for both administrators and visitors.
Step4: Improve Your Website's Content
Improving your website's content is crucial for engaging visitors and achieving your desired outcomes, whether it's to inform, entertain, or sell. Here are some essential strategies to enhance your website's content:
- Understand Your Audience: Before creating or updating content, know your target audience's demographics, interests, and pain points. Tailor your content to resonate with their needs and preferences.
- Focus on Quality: Quality content is informative, well-written, and relevant. Ensure accuracy, clarity, and coherence in your writing. Use compelling visuals and multimedia to enhance engagement.
- Optimize for SEO: Incorporate relevant keywords naturally throughout your content to improve search engine visibility. Create meta descriptions, title tags, and headers that accurately reflect your content and entice users to click.
- Provide Value: Offer valuable insights, solutions, or entertainment to your audience. Address their questions, concerns, or interests to establish credibility and build trust.
- Update Regularly: Keep your content fresh and relevant by updating it regularly. Add new information, refresh outdated content, and remove irrelevant material to maintain relevance and authority.
- Enhance Readability: Structure your content for easy readability. Use short paragraphs, bullet points, and subheadings to break up text. Choose fonts and colors that are easy on the eyes, and ensure mobile responsiveness for a seamless user experience.
- Encourage Interaction: Foster engagement by inviting comments, questions, or shares. Include social media buttons for easy sharing and integration with other platforms.
- Include Calls-to-Action (CTAs): Guide visitors towards desired actions with clear and compelling CTAs. Whether it's signing up for a newsletter, making a purchase, or exploring related content, CTAs help drive conversions and user engagement.
- Measure Performance: Use analytics tools to track the performance of your content. Monitor metrics such as traffic, engagement, and conversion rates to identify what works and what needs improvement.
- Stay Authentic: Be genuine and authentic in your content. Develop a unique voice and tone that reflects your brand's personality and values. Authenticity builds rapport with your audience and sets you apart from competitors.
Step5: Configuring a Static Page

Go to the WordPress administration dashboard's Settings » Reading page. Select the pages that you have already established for your main website and blog posts under the "Your homepage displays" option. Remember to save all of your modifications by clicking the "Save Changes" button at the bottom of the webpage. WordPress is going to display your website's blog articles on the "Blog" page and use the "Home" pages as the main landing page for your website.
Step6: Change the tagline and title of the website

You get the option to choose the title of your website throughout the installation process. You may also decide to include a brief tagline that sums up your website. The title and tagline of your website are able to be altered at any time by going to the Settings » General section. For improved search engine optimization, users may additionally leave the tagline box empty since WordPress platform SEO plugins like Yoast SEO, AIOSEO, and many others will disable it (more on this later). Remember to save what you've modified by clicking the save button.
Step7: Using the Site Editor to Create Navigation Menus

You may add the menus for navigation to a WordPress theme that uses blocks by going to the Appearance » Editor page. WordPress will open the menu section for editing when you click on it to add and modify content.
- Please select the "Select Menu" option.
- After that, you're going to be able to add several menus to your web page. Just pick the one you want as the navigation menu, such as the classic menu you already built.
- Following menu selection, you may customise the menu with additional pages, blog entries, logos, social media symbols, search functions, and more.
- To add a block to the navigational menu, just click on the Add (+) new button.
Remember to click the Save button in order to save your modifications when you're done.
Conclusion
In this Blog we explained in detail that How to make a website and Of which 43.1% are made with WordPress, an open-source, free content management system. Of all internet pages, 63.1% are made with a CMS. Users can choose a domain name and hosting to construct a website with this 2003 launch feature. For non-technical customers, Bluehost provides a single-click installation approach. Users can add additional pages and new templates to their web presence after installation.
WordPress is an extensively utilized website creation software, and the majority of users install the theme that comes with it. Through the admin interface, users may add and remove given and free themes, change theme preferences, and create numerous pages. Users using theme customizers can view a live preview of their webpage, but drag-and-drop is not supported. Additionally, users can alter the title and slogan, add a static home page, and adjust comment settings on their webpage. Users can navigate between pages and areas using navigation menus; both modern and vintage themes have a main menu.
Select the best TLD and keyword-based domain for your new domain through a hosting bundle or individual provider. Take advantage of a $2.75 discount by using the Bluehost link. Select the Hosting-WWeb - CMS Installer option on the Services menu to install WordPress as your CMS.