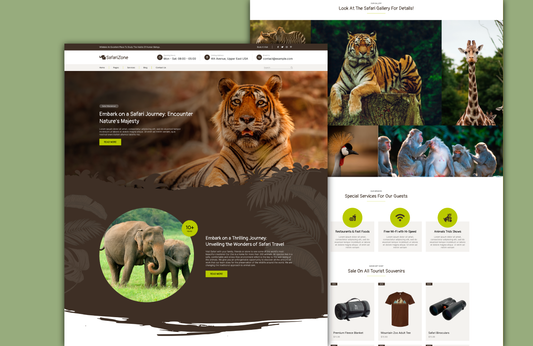
Images are more than just decorative elements on your website, they are essential for engaging visitors, conveying messages, and making your content visually appealing. From blog posts to product pages, images enhance user experience, improve readability, and can even impact your site’s conversion rates. However, large or unoptimized Images can slow down your website, frustrate visitors, and negatively affect your SEO rankings. This is why optimizing images for websites is critical. Proper image optimization ensures that your visuals maintain quality while reducing file size, enhancing website speed, and improving overall performance.
In this comprehensive guide, we’ll cover everything you need to know about optimizing images for websites, including choosing the right formats, resizing, compressing, SEO strategies, and advanced techniques like lazy loading and using content delivery networks. By the end of this guide, you’ll have an actionable strategy to make your website faster, more user-friendly, and search-engine-friendly.
Why You Should Optimize Images For Website

Website speed is critical in today’s online environment. Users expect web pages to load quickly, and search engines consider page speed a key ranking factor. Studies show that 53% of visitors leave a website that takes more than three seconds to load. Large, unoptimized images are one of the main reasons for slow-loading websites.
By learning how to optimize images for website, you can significantly reduce file sizes without compromising quality. The benefits include:
- Faster Page Load Times: Smaller images load quickly, improving overall site speed.
- Improved SEO Performance: Google favors fast websites, so optimized images can boost rankings.
- Reduced Bandwidth Usage: Optimized images consume less data, benefiting mobile users.
- Better User Experience: Faster pages reduce bounce rates, keeping visitors engaged.
- Higher Conversion Rates: Websites that load quickly tend to convert visitors into customers more effectively.
In short, optimizing images for your website is not just a technical task, it directly impacts user engagement, SEO, and conversions.
Understanding Image Optimization for Your Website
1. Choosing the Right File Format to Optimize Images For a Website
Selecting the correct image format is the first step in optimizing images for website performance. Different formats offer varying levels of compression, quality, and browser compatibility. Here are the main options:
JPEG/JPG: Ideal for photographs or images with complex colors. JPEG provides good compression while maintaining visual quality, making it one of the most widely used formats for web images.
PNG: Best for images that require transparency, such as logos or icons. PNG files maintain sharp edges but tend to be larger than JPEGs.
WebP: A modern image format that offers excellent compression without noticeable quality loss. WebP is widely supported across modern browsers and is an excellent choice to optimize images for website speed.
SVG: Vector-based format suitable for logos, icons, and illustrations. SVG scales perfectly on any screen size without losing quality and typically has a smaller file size for graphics.
Pro Tip: Choose your format based on the type of image. Use JPEG or WebP for photographs and PNG or SVG for graphics and logos to best optimize images for website performance.
2. Resize Images to Optimize Images For Website

One of the most common mistakes website owners make is uploading large, high-resolution images that are bigger than necessary. This can drastically increase page load times. To optimize images for website, always resize images before uploading them.
Tips for resizing:
- Match the image dimensions to the display area on your website. For example, if your content area shows images at 800×600 pixels, don’t upload a 4000×3000 pixel image.
- Use tools like Photoshop, Canva, or GIMP to resize images easily.
- WordPress users can rely on automatic resizing, but it’s best to start with appropriately sized images to reduce file weight.
- Resizing images helps maintain quality while significantly improving website speed and user experience.
3. Compress Images to Optimize Images For Website
Compression reduces file sizes while retaining acceptable quality, making it essential to optimize images for website speed and performance. There are two main types of compression:
- Lossy Compression: Slightly reduces quality in exchange for much smaller file sizes.
- Lossless Compression: Maintains full quality but reduces size less than lossy methods.
Recommended tools for image compression include:

- TinyPNG / TinyJPG: Excellent for compressing JPEG and PNG images with minimal quality loss.
- ImageOptim / ShortPixel: Useful for batch processing and high-quality compression.
- WordPress Plugins: Plugins like Smush, EWWW Image Optimizer, and Imagify automate compression during uploads, ensuring images are optimized without extra effort.
A good rule of thumb is to aim for images under 100–200 KB, balancing file size and visual quality to optimize images for website performance.
4. Implement Lazy Loading

Lazy loading is an advanced technique to optimize images for website performance. Instead of loading all images at once, lazy loading only loads images when they appear in a visitor’s viewport. This reduces initial page load time and improves overall performance.
Benefits of lazy loading:
- Faster initial page load for users.
- Reduced server requests and bandwidth usage.
- Improved mobile performance.
In WordPress, lazy loading can be enabled using plugins like a3 Lazy Load or by adding the native HTML attribute loading="lazy" to images. For sites with many images, lazy loading can drastically improve speed metrics and user experience.
5. Add Descriptive Alt Text
Alt text is a critical component of image SEO. It not only improves accessibility for users with visual impairments but also helps search engines understand the content of your images. Including relevant keywords naturally in alt text is part of effectively learning how to optimize images for website.
Tips for writing effective alt text:
- Be concise but descriptive.
- Include keywords naturally.
- Focus on describing the image for accessibility purposes, avoiding keyword stuffing.
Example: For an image of a red leather handbag, alt text could be: “Red leather handbag with adjustable strap and gold buckle.”
Alt text ensures that your images are both accessible and optimized for search engines, contributing to better SEO performance.
6. Optimize Image File Names
Before uploading images, rename your files using descriptive, SEO-friendly keywords. This step is important when you want to optimize images for website search visibility.
Example:
- Instead of: IMG_1234.jpg
- Use: red-leather-handbag.jpg
Descriptive filenames help search engines index images more accurately, improving your chances of appearing in Google Image Search results.
Advanced Techniques to Optimize Images For Website
- Responsive Images: Use the srcset attribute to serve different image sizes depending on the device’s screen width. This ensures mobile users don’t load unnecessarily large images.
- Image Sprites: Combine multiple small images into a single sprite sheet to reduce server requests.
- Next-Gen Formats: Use WebP or AVIF for smaller file sizes and faster load times.
- Browser Caching: Enable caching so returning visitors do not need to reload images.
- Image CDN Optimization: Some CDNs provide on-the-fly compression and format conversion to further optimize images for website speed.
Tools to Help Optimize Images For Website
Several tools make image optimization easier:
- Canva / Photoshop / GIMP: For resizing and editing images.
- TinyPNG / TinyJPG / ShortPixel: For compressing images efficiently.
- Smush / EWWW / Imagify: WordPress plugins for automatic optimization.
- Cloudinary / Imgix: Advanced optimization and CDN services for web images.
- Squoosh (by Google): Free online tool for compression and converting to modern formats like WebP.
Using these tools regularly ensures that your images remain optimized as your website grows.
Common Mistakes to Avoid
- Uploading large, unoptimized images.
- Over-compressing images, which reduces visual quality.
- Ignoring mobile optimization.
- Skipping alt text and descriptive filenames.
- Failing to use lazy loading or CDNs.
Avoiding these mistakes ensures that your website loads quickly, ranks well in search engines, and provides a smooth user experience.
Conclusion
Learning how to optimize images for website is essential for faster load times, better SEO, and a more engaging user experience. By choosing the right formats, resizing and compressing images, implementing lazy loading, adding descriptive alt text, using CDNs, and applying advanced optimization techniques, you can dramatically improve your website’s performance.
Regularly auditing your website’s images and following best practices ensures that your site remains fast, visually appealing, and search-engine-friendly. Optimizing images may seem small, but it delivers significant results in speed, accessibility, and user satisfaction. Make optimizing images for website a part of your ongoing website maintenance routine to maintain high performance and keep visitors happy.